
EnsembleBot is part software and part hardware, though mostly hardware. Building robotic instruments had been a vague dream for us for decades. But the dream remained a dream, until the advent of Arduino micro-controllers and cheap electronic and mechanical components. In this page we’ll give an overview of the EnsembleBot.
THE ENSEMBLE
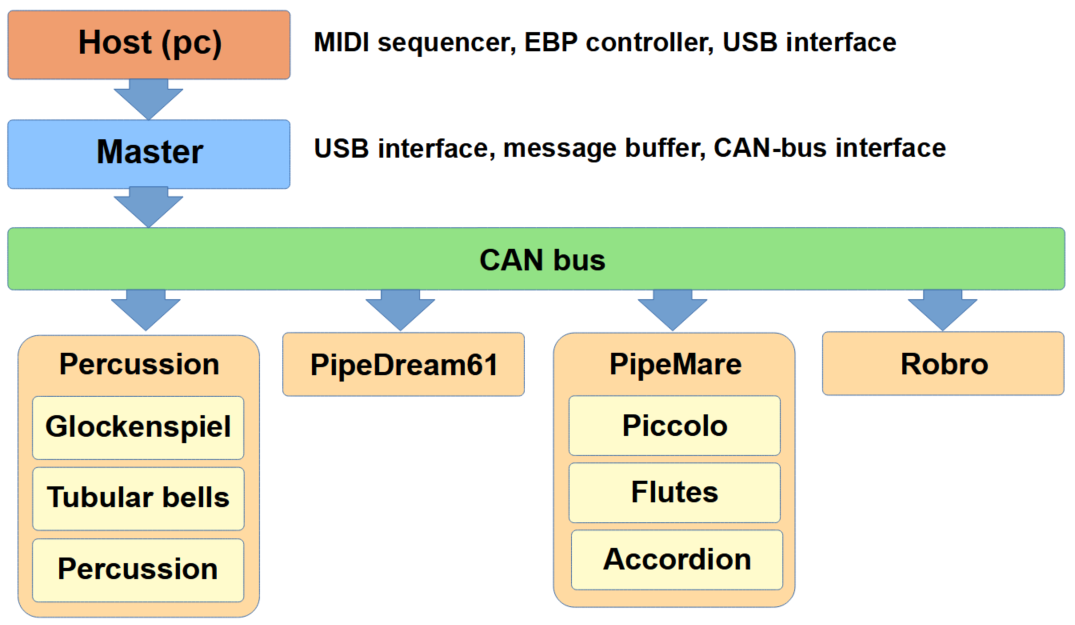
Basically, EnsembleBot consists of three parts: (1) a host/MIDI sequencer, (2) a master controller and (3) a number of electromechanical instruments.
Also, we have a central power supply, feeding power to the ensemble, as well as the PipeWind blower systems to supply air to all the organs.
You can read much more about all these parts elsewhere on this site. So, here we’ll focus on the bigger picture, and how we tie together all the parts electronically.
STARTING OUT
We’ve chosen the instruments more for their potential for mechanization, than for a grander ideal of sounds and timbres. Some of the instruments are completely homemade (e.g. the tubular bells). But most are partly recycled. Some are “real” instruments, mechanized for our purpose (e.g. the glockenspiel). Some are based on parts of actual musical instruments, but heavily modified for our purposes (e.g. the PipeDream61 organ).
The first project was the tubular bells, a mechanically very simple instrument. It consists of 15 pieces of steel tubes cut to precise lengths. We use small 12V push/pull linear solenoids mounted on a rack to strike the tubes. When you’ve tackled the problems of power and noise associated with solenoids, they are extremely simple to use, control and design for.
And so, many of the subsequent instruments in the ensemble are based on linear solenoids in different configurations. This includes the glockenspiel, our simple percussion instruments and even some of our organ projects.
NEXT LEVEL
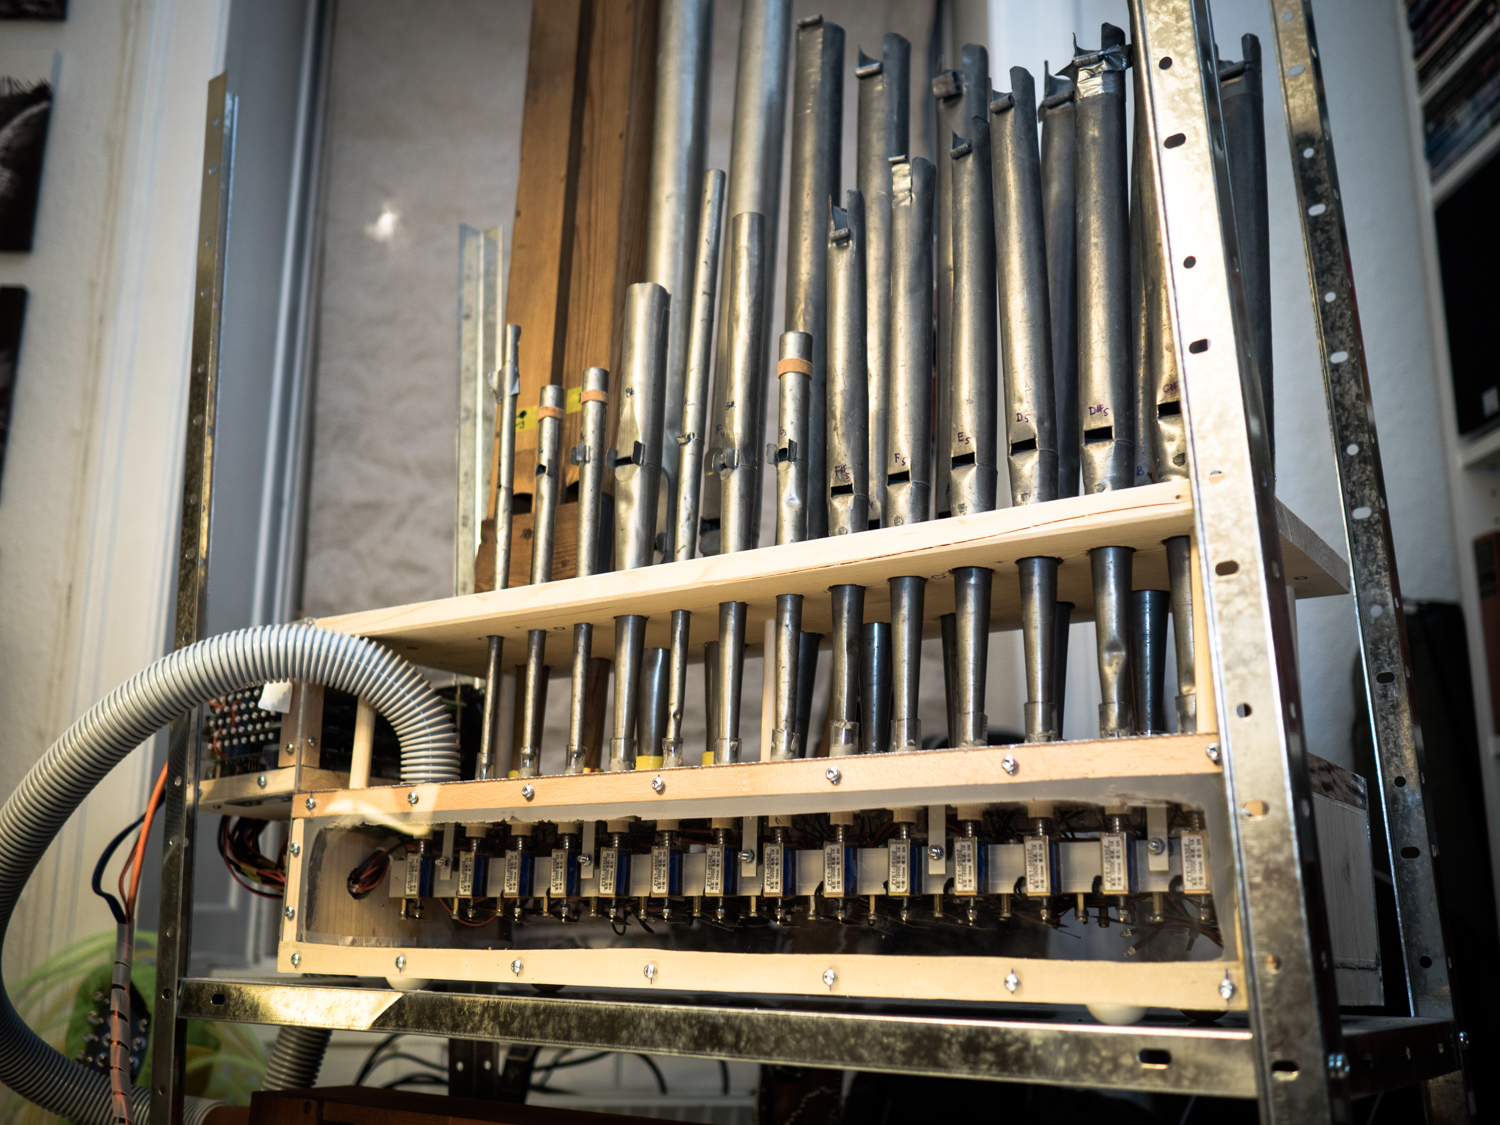
While hitting stuff is fun, it’s not enough in the long run. I got my hands on a number of old old pipes from at least 5 different organs and organ ranks. And so I began experiments to make a real robotic pipe organ. These pipes became the proof-of-concept organ, PipeDream24 – also based on linear solenoids. Well, if the only tool you know is a hammer, everything looks like nails…
PipeDream24 presented a lot of valuable lessons on what works and what never to try again. So, based on those experiences, work began on the PipeDream61 organ, and later the more ambitious PipeMare triple-organ project.
We didn’t base all the instruments on linear solenoids, despite their somewhat panacean status in our early projects. The PipeMare organs, for instance, are based on more conventional refurbished organ magnet valves. The Pipemare Accordion uses micro servos and DC motors, but still adheres to very simple design principles.
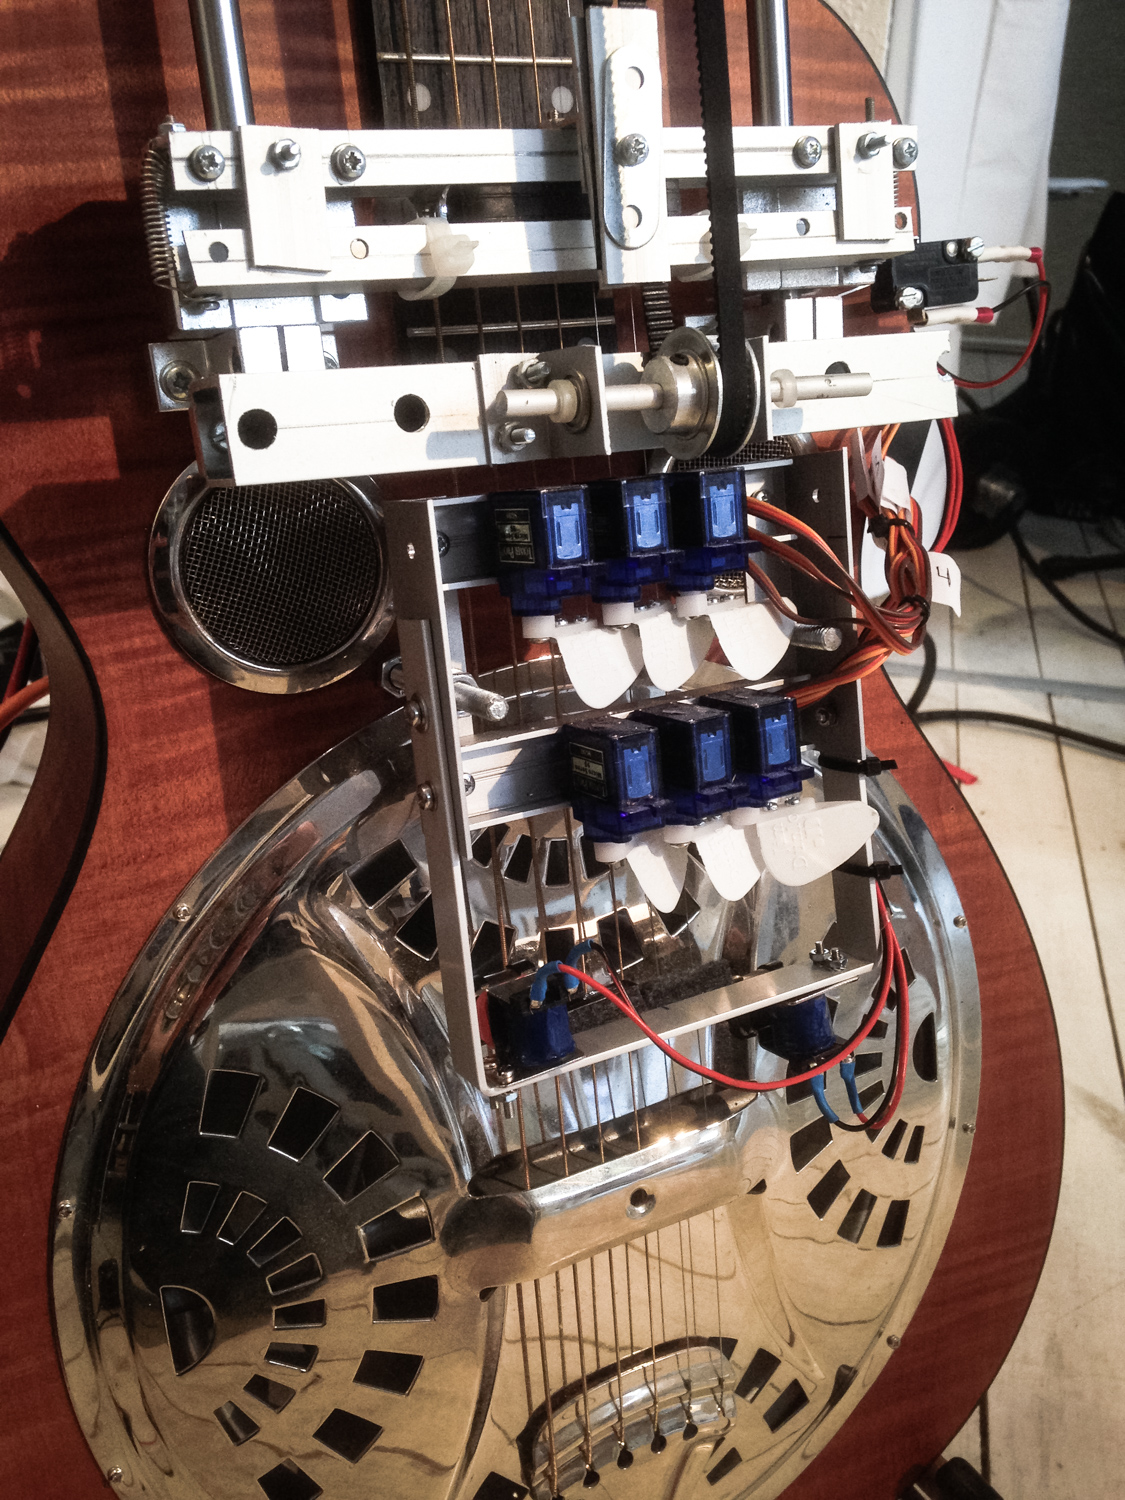
To take things even further, work began on the Robro. This is a robotic “dobro” or resophonic lap steel guitar played entirely electromechanically. This proved to be quite a challenge, both in terms of mechanical stability, electromechanical precision, microcontroller programming and musical composition. We haven’t completely finished the Robro. While the concept is sound, it needs some reconstruction before it can be a part of the ensemble.
Other instruments – both finished and planned – solve the problems differently. But as an overall principle, all instruments are electromechanical, with an emphasis on mechanical. The sound made by the instruments must be physical in nature, i.e. produced by hitting, stroking, striking, flicking, stretching, or blowing air through them. There are no electronic sounds, like synthesizers or oscillators. Well, yet. I do have a vague plan to make a robotic theremin, which would challenge our principles.
THE HOST
It would be nice to be able to play the instruments directly. But considering the size and diversity of the ensemble, it’s more practical to use some kind of sequencer. The most obvious solution is to base the sequencing on MIDI. It’s a simple and well-known protocol, and MIDI files are an easy way to store music sequences adapted for EnsembleBot.
Our resident MIDI geek has made a special protocol to communicate with the EnsembleBot via USB. The protocol, called EnsembleBot Protocol – or EBP – is basically a dumbed down version of standard MIDI. We need only simple commands (NOTE_ON, NOTE_OFF and basic SYSEX), so converting MIDI to EBP is very unproblematic.
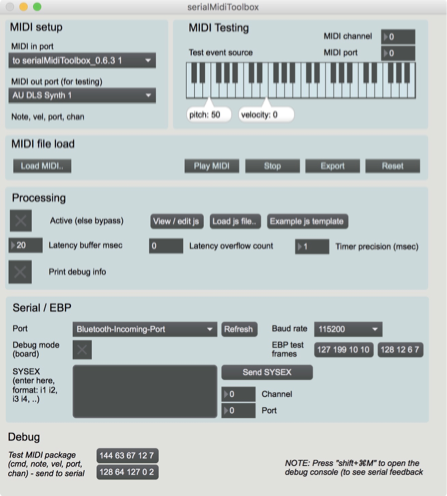
A Max application receives MIDI, either as a MIDI sequence file (.mid files), directly from e.g. MIDI keyboards attached directly to the host computer, or another application working as MIDI composer/controller. Currently, we use the free scorewriter MuseScore for arranging/composing and MIDI sequencing/playback through the Max application. However, anything with MIDI output should work.
The Max application basically translates the MIDI to EBP, and transmits it serially through USB to the EnsembleBot master controller.
THE MASTER CONTROLLER
The master controller is the bridge between the MIDI host (pc) and the EnsembleBot, and it’s main function is to relay MIDI/EBP messages from the USB serial bus to the EnsembleBot CAN bus. Previously, this function was served by the percussion microcontroller responsible for tubular bells, glockenspiel and miscelleaneaous percussion.
To reduce the risk of buffer overflows because of too slow buffer handling (which actually did occur) the bus bridge tasks has now been moved to a dedicated master controller, that pretty much only buffers incoming serial messages and relays them onto the CAN bus.
Making a stand-alone master controller also helps keep the EnsembleBot more modular. Previously, nothing worked if the combined tubular bells/glockenspiel/percussion circuitry wasn’t present and switched on. Now, it’s possible to use only a single instrument (or instrument group) independently.
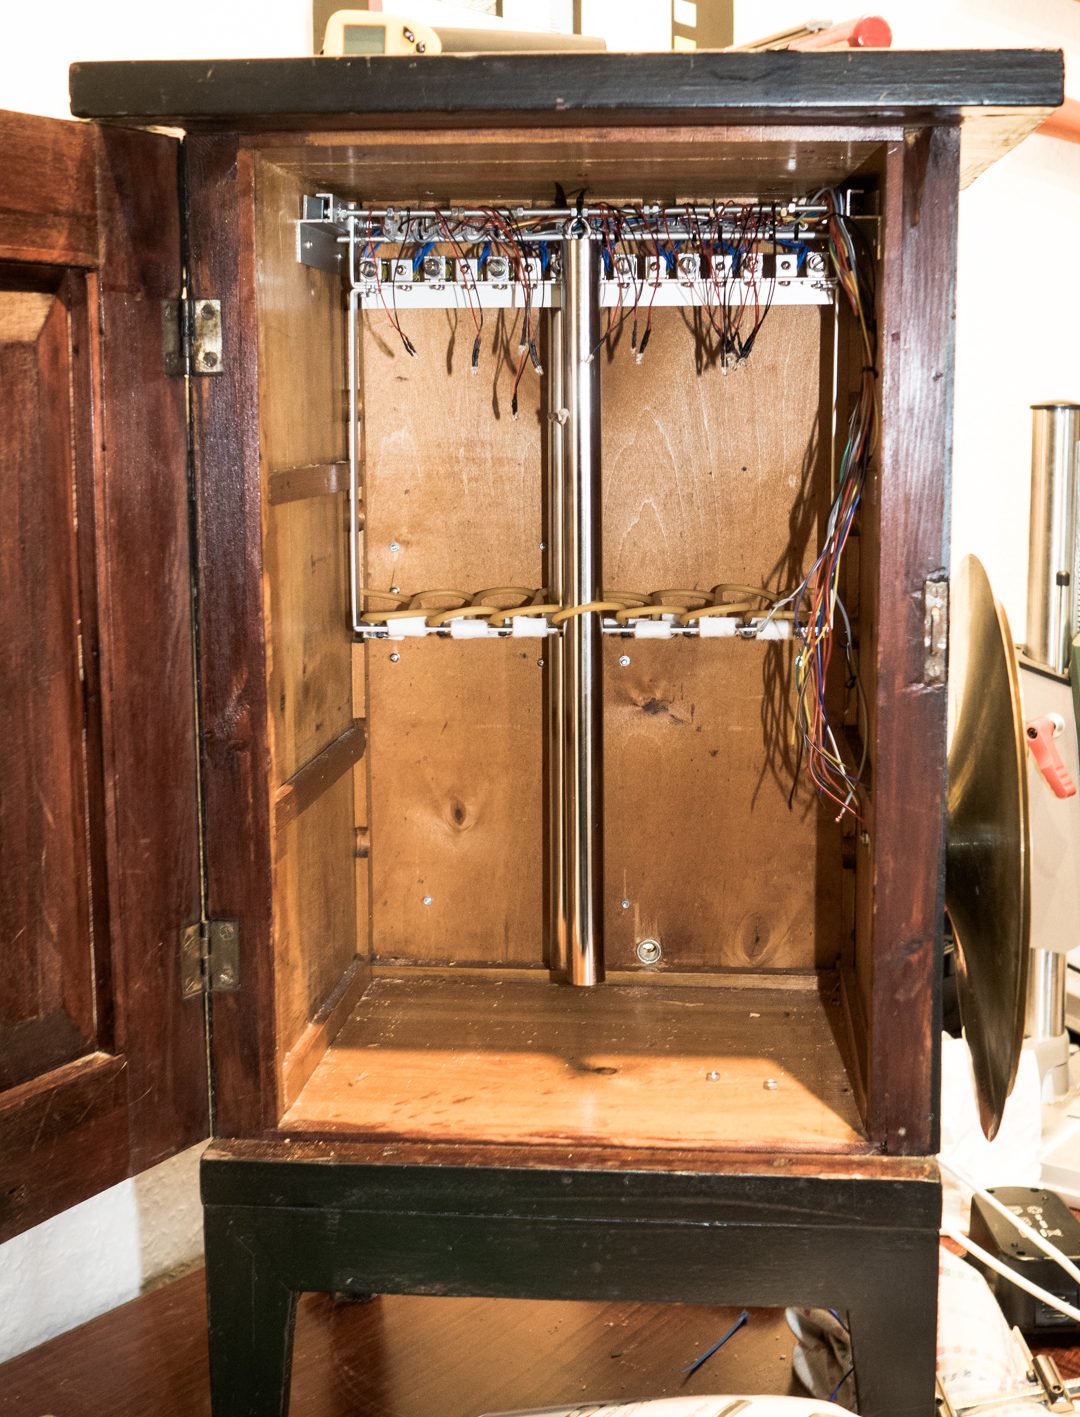
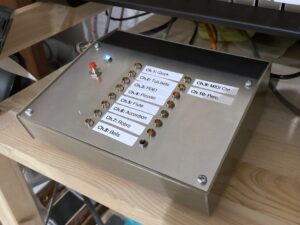
The master controller is based on a Teensy 3.2 (72 MHz). This is a bit oversized, but it’s better to err on the side of caution. This extra muscle makes the firmware coding easier, as it doesn’t have to be perfectly optimized. Also, to have some kind of practical feedback, the controller box has been fitted with 16 LEDs – one for each MIDI channel – that will light up shortly, when a MIDI/EBP message is sent to that particular channel.
The hardware is assembled and tested, but the firmware has yet to be written.
Read more about the microcontrollers of EnsembleBot here.
TYING IT ALL TOGETHER
The master controller itself has no instruments attached to it, as it only acts as a communication bridge between the pc (MIDI/USB) and the rest of the EnsembleBot (EBP/CAN). Thus all of the instruments or instrument groups are so-called “slave” instruments.
The slave instruments are more or less self-contained units, needing specialized control, monitoring, timing and so on. As such the EnsembleBot master controller can’t practically control them alone.
The PipeDream61 slave controller receives simple commands about which MIDI notes must be played (or stopped). Similarly the Robro gets commands about at which fret the steel must move to and which string to pick. But controlling these instruments takes a lot more work. The PipeDream61 controller needs to communicate with specialized solenoid drivers, keep track of the accumulated heat build-up and cooling of each solenoid, support special calibration modes for easy pipe tuning and much more. The Robro needs to precisely control a stepper motor, six servo motors, two rotary solenoids and a number of sensors.
All of these functions are very specific for each instrument. So, the slave instruments have their own controllers, capable of parsing EBP commands relayed by the master controller. The slave controller then has the responsibility for translating these commands into what needs to be done to play the instrument.
THE CAN BUS
To tie all the slave instruments together with the master controller, we need an electronical communication bus. Our demands for such a bus are:
- A simple protocol , supported by microcontrollers
- A suitable bus length
- A fairly high bus speed
- And (of course) a low price tag!
Obvious candidates could be standard serial busses like RS-232 or RS-485. But they don’t come with a protocol, and so implementing a communication protocol and fault detection is an added complexity. Although especially RS-484 is very resilient, there is a better alternative: CAN bus.
CAN bus is made specifically for automotive applications. By design it is both resilient, extremely fault tolerant, has its own simple protocol, supports medium length busses (several meters), and it supports a bus speed of 500 kbps or more.
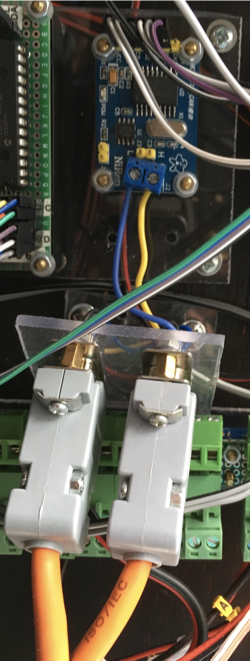
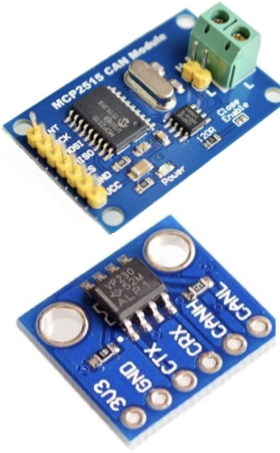
But most importantly, using proper hardware interfaces, microcontrollers almost universally support CAN bus. For most Arduinos there are robust and cheap modules based on the MCP2515 controller and the TJA1050 transceiver. They work like a charm. Other microcontrollers like Arduino Due, Teensy or STM32F103 “Blue Pill” has built-in CAN controller. They only need a 3.3V transceiver like the SN65HVD230, also readily available as cheap, pre-assembled breakout modules.
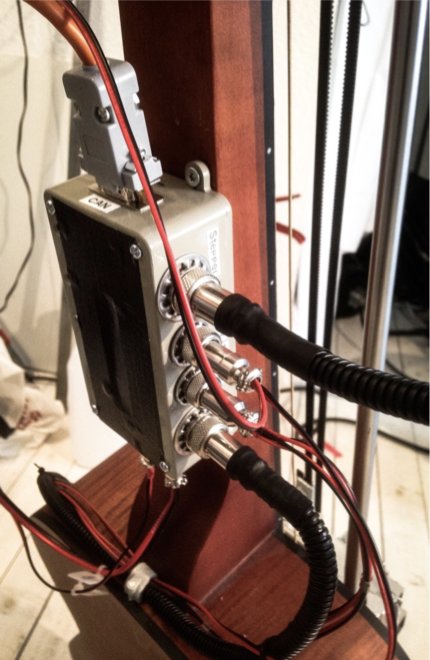
The cabling is done with category 6 double-shielded twisted pairs (S/FTP) network cable, making the bus even more protected from all the noisy components in EnsembleBot.
The CAN bus is a serial bus, and in principle it supports several bus architectures. But to use it as a fault-tolerant high-speed bus (up to 1Mbps) it has to be a terminated linear bus. That only means that we need to place the slaves and master controller as beads on a string.

Next: Read about the Microcontrollers of EnsembleBot