
The first many instruments in the EnsembleBot were more or less simple percussive instruments. All of them are based on linear solenoids being actuated to hit something. Being so relatively simple in nature, all of these instruments can be controlled by one single microcontroller.
Below is a discription of the general percussion circuitry. See subpages on the percussive instruments for more detailed information:
MICROCONTROLLER
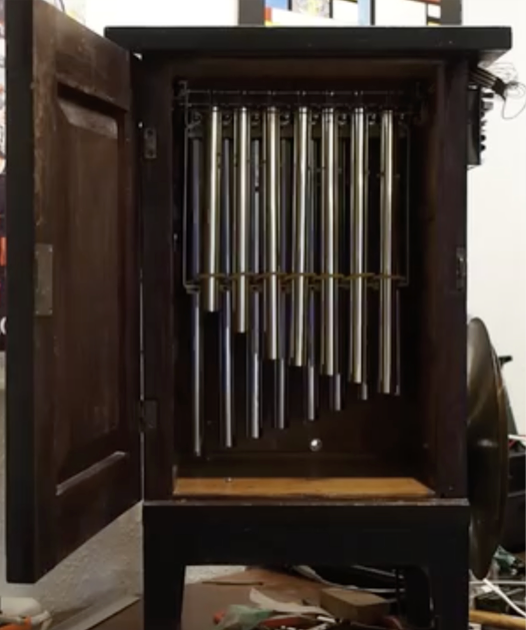
Pretty much all of the percussive instruments are placed inside, under, on or around a small wooden cabinet. Back when the EnsembleBot project was in its infancy, this small cabinet was supposed to house the entire ensemble. Of course, in time the instrument grew, but the cabinet is still the center of most of the percussive instruments and their electronic circuitry.
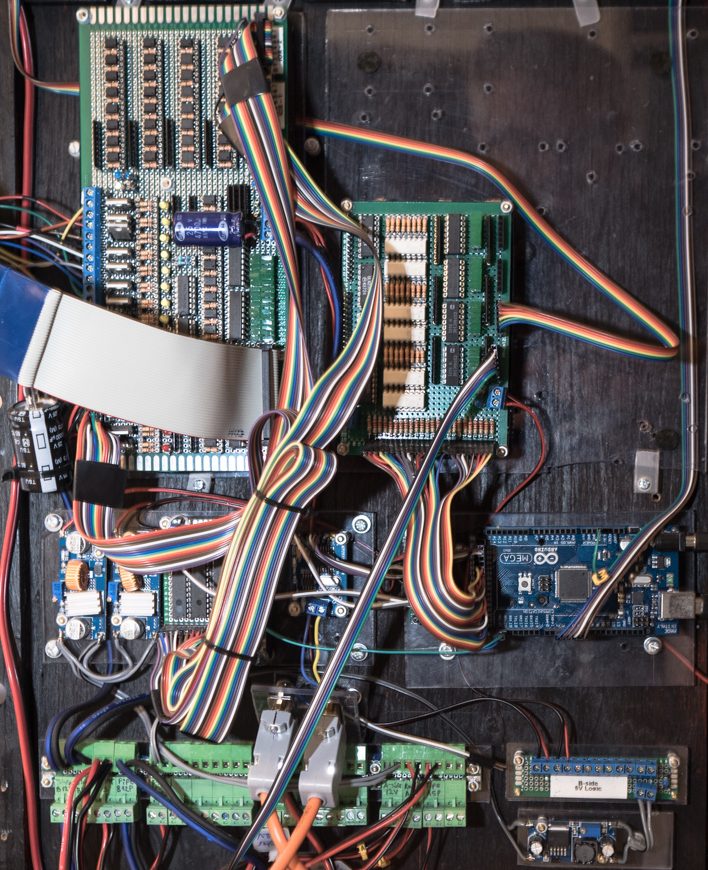
We placed the percussion circuitry on the backside of the small cabinet along with power connections and driver circuits. The local percussive instruments are controlled either by the Arduino I/O ports (e.g. most of the simple percussion instruments like drums and cymbals) or indirectly by an I/O expander controlled by the Arduino through I²C (the tubular bells and the glockenspiel). More about that in a moment.
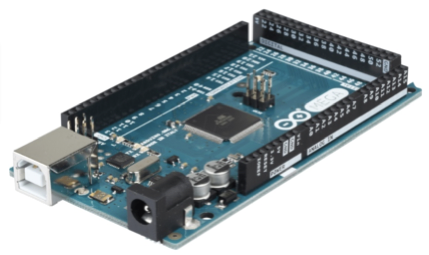
The microcontroller of the percussion circuitry is an Arduino Mega 2560 R3 microcontroller. The Mega has a lot more memory and general I/O ports than e.g. the more popular Arduino Uno or Nano, which makes it ideal for this purpose. For all the percussive instruments we only need simple digital I/O ports to switch solenoids on and off.
So far the 16 MHz processor has proven sufficient. If it becomes a bottleneck, it is easily replaceable by the (almost) pin compatible but far superior Arduino Due (84MHz 32-bit ARM processor).
The Arduino firmware has two main tasks: (1) Receiving EBP messages from the master controller, and (2) Managing local instruments, i.e. instruments directly or indirectly attached to this Arduino.
Local instruments are simple instruments attached to physical I/O ports or extended ports (see below) of the Arduino. These are primarily instruments based on linear solenoids that are actuated by activating a port for a number of milliseconds. This is handled by a queued scheduler.
PORT EXPANDERS
Even though the Arduino Mega has many I/O ports (in principle 54 digital ports), we are going to need a lot. The glockenspiel alone uses 27 ports, and the tubular bells use another 15 ports. Reserving additional ports for SPI and I²C does not leave many ports for e.g. percussion. So we need more I/O ports. More! MORE! MORE!!!

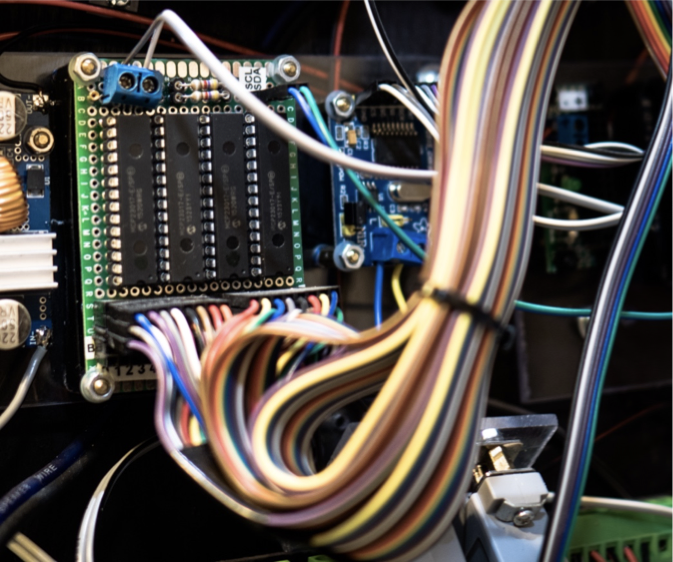
With four MCP23017 I/O expander (or IOX) chips we use two I²C bus ports to get 64 new digital (output) ports. The ports are easily controlled through a simple hardware abstraction on the microcontroller. This makes it transparent to the scheduler if the port is a physical Arduino port or an expanded/remote port on a MCP23017.
We are currently using 2 x 16 of these extended ports for the glockenspiel, 1 x 16 ports for tubular bells, leaving 16 ports for future needs.
The outputs are made as simple pin rows, making it easy to attach ribbon cables with dupont connectors.
As will be discussed in the pages about the PipeDream24, PipeDream61 and PipeMare projects, we find many more uses for the MCP23017 I/O expanders. And that is a recurring theme in EnsembleBot: Stick to what you know. There are many devices and solutions that are used again and again throughout the entire project. This ensures a large degree of predictability and reduces the need for R&D, but on the other hand it can (and does occasionally) lead to suboptimal solutions. The good becomes the enemy of the best.
Next: Read about the Tubular bells